Saturday 30 April 2011

Zinc Induced Dank

So yesterday (Friday) I was forced to take a day off the job as I was in dank/hangover mode. I crawled in at about half 4 in the morning and woke up and I had a bit of a hangover and the dreaded dank. Thursday I started to feel the symptoms of the Flu coming on but I knew exactly what it was. Wednesday I was welding zinc nuts for the seat mounts and I remember having trouble with one because the wire speed was wrong and I remember an odd smell which must have been the zinc fumes. Some one at work told me that if you inhale fumes from welding galv steel you can get flu symptoms, I'm guessing this is the case as today (Saturday) I woke up feeling fine apart from a bit of a sore throat and my missing voice. So yesterday was sat in front of the TV all day feeling sorry for my self subjected to nothing but Royal Wedding coverage be cause there was nothing else on, Like showing it on one channel isn't enough!

Right Hanger Tacked and Clamped
Left Hanger Tacked


So to day I was back on the job. Wednesdays post I wrote that I had bolted up all the rear panels ready to tack weld up. Today I put the wing beading on between the wings and body so that the wings were in there true position. Next I did a bit of tapping and aligning so that every thing looked straight, one I was happy with this I clamped up the new bumper hanger panels and tack welded them in place. These were not the best fit so it took a bit of hammering, clamping and forcing to get them in the right place before tack welding.


Next I removed the wings and fully welded up the bumper hangers and rear valence. I wanted to have the rear panel as a bolt on but I decided it will be a much more neat job if I weld it on and won't scratch the paint every time I remove it. The welding was straight forward and I had to make a couple of filler pieces but once doe that was all the major welding done.

Patches Required all over
Back end complete


All there is to do for the welding is patch up a few small areas and then its on to the gear box, suspension and steering.

Thursday 28 April 2011

Deep Cuts

Bolted up for a test fit
Last night I was in the pub and notice cuts all over my hands and arms I looked like I was self harming! I did it again today, a sharp edge of plate cut through my crappy B&Q gloves and gave me a pretty nasty slice. After I some time I managed to stop it bleeding and I could get on with things.

Back End Gone!
Another angle just incase


I've been messing with the back end, firstly I chopped out the rotten bumper hangers and some of my finger. I then bolted up the new panels, wings and rear valence. The original plan was to make the rear valence a bolt up panel, but it doesn't fit straight in and requires a bit of jiggling and the likelihood is that it will get scratched when I remove this so I've decided to weld it on. I had a look at what adjustments I need to do to the new panels and then in bolted every thing.

New Beam
All preped up


I then got a phone call from work to tell me I had a package arrive at the office, great, this would be the new narrowed beam! So after I picked up the large very heavy box I went back the Paul's garage where I was greeted with a piece of chocolate cake. I spent the next hour or so grinding, cleaning and preping the original metal ready for the new panels.

Once that was done I bolted every thing back up again and that was as far as I got, well all I could be bothered doing although it did take most the day. Next trip should be Saturday and start aligning the panels amd tacking them up. After this the next job is to pull out the gear box, I'll leave the rear valence off while I do this to give me a bit more room.

Wednesday 27 April 2011

Comfy Ride

Mounts Completed
Today I finally got the seat mounts finished off, took a lot longer that expected although there was a lot of messing around working out how I was going to do it. There are a few pictured to show what I've done. Just before I finished for the day, I also welded the accelerator pedal clip in place.

Accelerator Pedal Clip

Rear Inner Mount


Rear Outer Mount
Rear Mounts


 The seats are looking a but tatty and fancy a red interior so I got a quote for the front and back seats to be covered in red leather and they said it would be around £1100 so I think I'll get a leather restorer on them for now. Tomorrow I should be able to crack on with the rear bumper hangers and valence and once they are done that will be the major repairs done and just a bit of tidying to do.

Monday 25 April 2011

Porsche Pain

After an Easter weekend of binging, yesterday I decided it was time to give the liver a rest and get some work done on the rust bucket. I woke up this morning at 6am for some reason and started to plan my day, I got to the garage about 10am ish and after I decided to get the seat mounts done I picked up one on the seats on the way.

The first obvious problem was that the seat runners are a bit wide to fit between the chassis and the heater channel. After an hour or so of changing my mind about how to do this I finally went back to my original idea. The plan is to use a beam of 50x50 box section across the floor plan to bolt the front of the runners to and a couple of individual mounts at the back.

I Drilled some holes and welded on a captive nut to bolt to. Next problem was that the front mounts bolt down at an angle so I had to cut a couple of slots and tap it down to suit the seat runner mounts. After welding up the cuts I added some angle brackets so the box section can be welded to the floor pan. The box section has a radius to the corners which may result in a bad weld so the angle will help provide a good connection.

Front mount
 I spent most the day on this and then started to mate the rear mounts. These new brackets I designed have given me full travel of the seat runners where before I only had about half as they were welded and fixed to the original runner for the car and seemed to restrict travel. Also I have positioned the seat so that there is some leg room in the back while it is still comfortable to drive in the front without hugging the steering wheel. Another problem I had in the past was if any one tried to get in the back it was very tight and awkward, this has also been fixed as I can now move the seats all the way forward.
New mount positions
My seats are looking tatty and as soon as I have the funds after the MOT, the first thing I will spend any money on is having these recovered in red leather. Tomorrow I'm going for an early start and hoping to finish fabrication all the mounts and maybe have these welded in by the end of the day.

Monday 18 April 2011

Ebay Baddies!

A few weeks ago I won an ebay auction for a padded dash as the one I have doesn't suit the vents I have. Anyway after two weeks of emailing and no reply I threatened to open a case and he instantly replied claiming that the Item had been lost in the post and that he had a few in better condition and would send a new one out the next day. I asked If he had sent it two days later, the 14th April I think and he said he had. Any way Today I revived the same damaged dash shown on the photos from the auction. So had what had once been found? No! On the delivery note It said that the Item was sent on the 14th April. I would name and shame but not I'm sure its the right thing to go.

Any way I'm stuck with it now and don't expect to receive a second one in better condition. These things in good or near perfect condition with no cracks are like the proverbial brown stuff from rocking horses so I have a plan to repair. This is an expensive plan but I will have a Pimp dash.

I'm thought this needs covering in vinyl and some one on bay is selling sheets of carbon fibre effect vinyl wrap, so after watching a video on how to wrap I thought that the shapes in the dash may be too complicated, so then I thought What about real CF? I found a supplier that had videos on their web page for skinning. This is where you apply a single layer of CF cloth over an existing part. Perfect!

So this is my plan, put I think I'm going to develop this further. Once U have coated my dash I plan to make GRP mould from this from which I could possibly make another CF dash from scratch. Problem with CF is the cost of the resin, To skin the dash it will cost £70-80 in materials plus time on the job. To make a full CF dash using the mould I think it would be about £100-120. This also got me thinking that if this is successful, maybe I could make my own bumpers, headlight ring and spoiler moulds?

I thought that It may be a bit much CF and not look right with the lime green paint so do I go back to the original paint colour the same as most the other Euro lookers for the sake of the dash? I guess we will just have to see.

Saturday 16 April 2011

Downs and ups

So last Mondays post I had the front bumper hangers welded on the the spare wheel well. The next day I fully welded in one side which was slow as I was pretty tired but got it done. when I got home I was so tired and on a bit of a downer thinking about how I'm going make the rear bumper hangers fit, thinking about it the next day made it worse so I had a night off.  
Bad alighnment

Thursday I was back on the job and the break was good, I got the second front bumper hanger trimmed down and after some fettling I welded it up. The panels are ok but a bit over sized at the bottom of the inner wing so I had to cut a 'V' and hammer the rolled lip in an add a bit of a filler piece.
Finished panel with the panel realigned
Both sides done


Once done I offered up the front panel and decided it was time to weld it on, although I did forget to drill a hole to screw on the linkage cover plate which, Ironically, was the one thing concious that I needed to do while working on the front!  Over all I happy with results and just need to do a little bit more grinding. I've got a day of grinding and finishing planned on my week off at the end of the month.

Front End Done!
Today is Saturday and Michelle  ditched me to go to Liverpool for they day so I went to speak to some one about spraying my car and it's looking like he can do it in July with a turn around of around a week so things are moving forward and It may be on the road for the Blackpool Breeze! I also need a new fibre glass wing on the front as one is deformed, I spoke to day mouldings and they quoted that I would have one by October! The sprayer said he can paint that one later on so I will just stick with the deformed one for now.

Also today I cut off part of the rear valence and I dropped the oil out of the engine and then pulled it out. This was much easier and a single person job this way so the rear valence will be a bolt off job.
Things are looking up and I feel better about it now than what I did on Wednesday and plan to get the rear end boxed next week, then all that's left on the welding is a big of a tidy up and fabricate the seat mounts.

Wednesday 13 April 2011

Bling Bling Lights

Ok so I've decided that I'm going to be ordering some of these bad boys for the project, they are CSP LED tail lights but not sure which ones to choose. There is now a poll to decide. The car will be Mazda Spirited Green Metallic and I'm not sure which will go best so there are pictures bellow and please vote.

Thanks

Red/Clear

Red/Smoked

Clear

Monday 11 April 2011

New Gloves


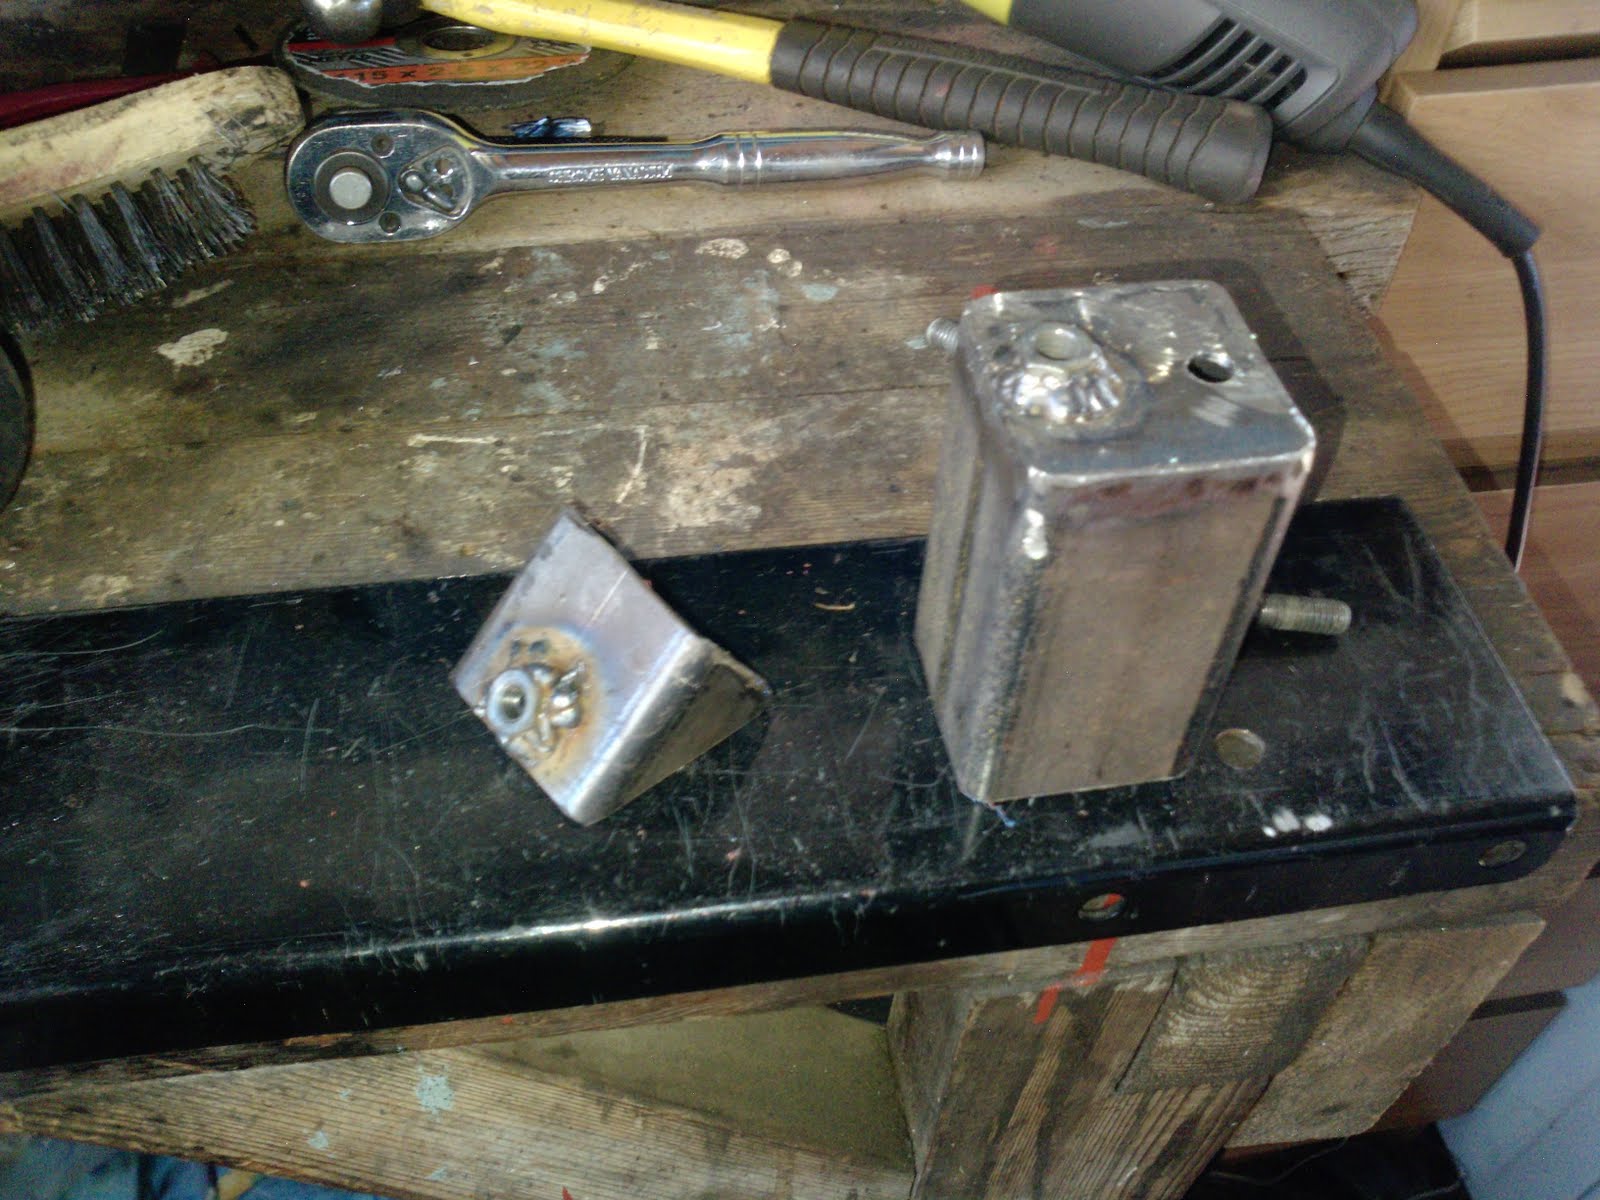
  Last week wasn't very exciting so didn't bother with an update, I only go one night on it so just finished off hole in the rear near side arch. I also moved on to the rear bumper hangers. This worried me, I cant seem to get one to fit anywhere near right so I've asked advice on VZi and I'm waiting to see what comes from that before I finish is off.

So tonight I got both of the front bumper hangers tacked in place and welded to the spare wheel well panel.
If you have been following this, you will know that I cut the existing ones off a while ago but I've not touched them since welding the spare wheel well in place. I've been putting off welding in these panels worried about the alignment and that it may be a bit too difficult for my ability. So tonight I had no choice but to start them and not that bad.

Cleaned up ready for new panel
First panel clamped up


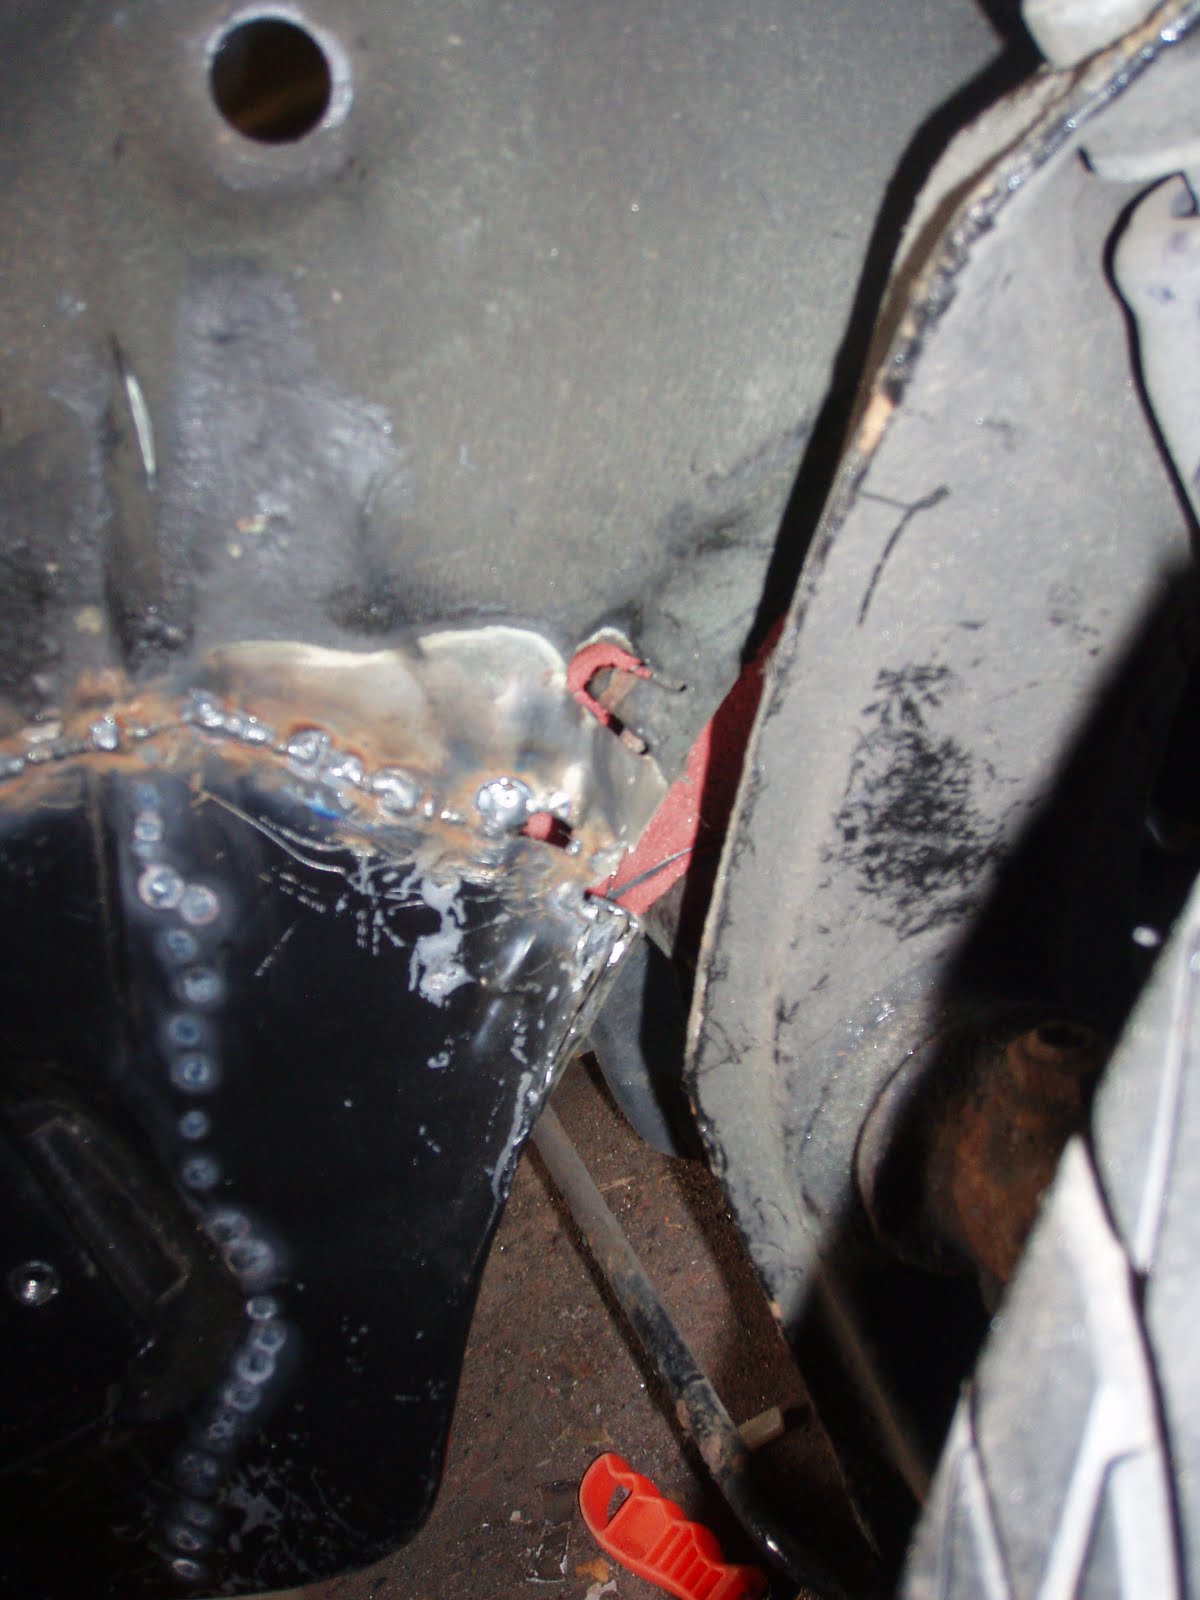
Once the original surface was cleaned up, next was to bolt up the new panel to the wing bolt holes and marked it out for trimming. Once trimmed I aligned and clamped up the new panel and welded it to the spare wheel well and the lower part of the main body frame work. I didn't got too far up the frame, I want to get the rest of the panel chopped and aligned before I do this.

Levelling up the bumper

Now came what I thought was the hard bit. I bolted up the new panel and then bolted up the front bumper. I used a spirit level on the flattest part of the body I could find (beeltes are very curvy!) and used a jack to level up the body. Next I placed a piece of wood between the bumper irons and placed another spirit level on top of this to correctly align the bumper mounts. After about 20 minutes of tweaking and clamping, I finally got it all level and then welded up the second panel in the same way as the first.
First panel in
Second panel in


I decided to wear my new glove today that have a second layer of leather on the finger, just as well as I put the grinder through the top layer!

I was thinking the other day that I've probably saved myself around £2k so far by making the decision to weld it myself. When I started this I was a bit scared doing all the welding myself but now not I'm starting to find it more enjoyable.